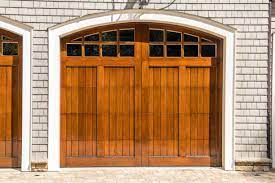
Wood doors add warmth and character to any home, but over time, they can lose their beauty due to wear and tear. Whether your door has faded, scratched, or peeled paint, refinishing it can bring back its stunning look. The process may seem overwhelming, but with the right steps, tools, and a little patience, you can restore your wood door to its original charm.
At Desert Rose Doors, we specialize in bringing wood doors back to life. Follow this step-by-step guide to achieve a professional-quality finish.
Why Refinishing Wood Doors Is Important
Wood doors are exposed to sunlight, moisture, and daily use, all of which can cause damage. Refinishing helps:
- Restore the door’s natural beauty
- Protect the wood from further damage
- Extend the life of your door
- Enhance your home’s curb appeal
Whether you’re refreshing an old front door or refinishing an interior one, taking the time to do it right will make a big difference.
Step 1: Gather Your Materials
Before you begin, make sure you have the following supplies:
✅ Sandpaper (80-grit, 120-grit, and 220-grit)
✅ Wood stripper (for removing old finishes)
✅ Putty knife or scraper
✅ Painter’s tape
✅ Drop cloths
✅ Safety goggles and gloves
✅ Wood filler (for fixing scratches or dents)
✅ Stain or paint of your choice
✅ Wood sealer or polyurethane finish
✅ Paintbrushes and rags
Step 2: Remove the Door and Prep the Area
To make refinishing easier, take the door off its hinges and place it on a stable surface like a sawhorse. If you prefer to leave it hanging, be sure to cover the surrounding area with drop cloths to prevent messes.
Protect the Hardware
Use painter’s tape to cover hinges, knobs, and any glass panels to prevent damage from chemicals and paint.
Step 3: Strip Off the Old Finish
If your door has an old finish (paint or stain), apply a wood stripper using a brush and let it sit for the recommended time. Once the finish starts bubbling, gently scrape it off with a putty knife.
Tip: Work in sections to prevent the stripper from drying before you can remove it.
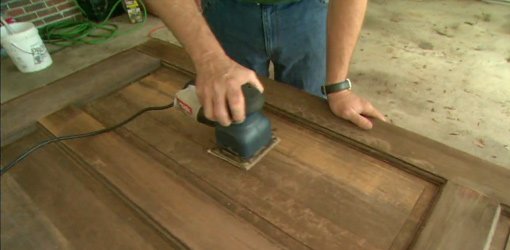
Step 4: Sand the Surface
Sanding smooths the wood and preps it for a new finish. Follow these steps:
- Start with 80-grit sandpaper to remove any remaining stain or paint.
- Move to 120-grit sandpaper to smooth out the surface.
- Finish with 220-grit sandpaper for an even, polished feel.
Always sand in the direction of the wood grain to avoid scratches.
Step 5: Repair Any Damage
Check your door for cracks, dents, or small holes. Use wood filler to patch them up, then sand the area lightly once it dries.
Step 6: Apply Stain or Paint
Now comes the fun part—choosing your new look!
For a Stained Finish:
- Use a clean rag or brush to apply wood stain in long, even strokes.
- Wipe off excess stains with a cloth.
- Allow the stain to dry for several hours before adding another coat if needed.
For a Painted Finish:
- Apply a wood primer first for better coverage.
- Use a high-quality paintbrush to apply paint in smooth strokes.
- Allow each coat to dry completely before adding another.
Step 7: Seal and Protect the Finish
Once the stain or paint is dry, apply a protective topcoat like polyurethane or wood sealer. This will help shield your door from moisture and daily wear.
- Use a brush to apply thin, even coats.
- Let each coat dry completely before adding another.
For outdoor doors, consider using a UV-resistant finish to prevent sun damage.
Step 8: Reinstall the Door
After the final coat is dry, carefully remove the painter’s tape, reattach the hardware, and hang your newly refinished door.
Enjoy Your Beautifully Refinished Wood Door!
Refinishing wood doors is a rewarding project that brings new life to your home. Whether you want to maintain a classic wood grain look or switch to a bold new color, following these steps will ensure a smooth, long-lasting finish.
If you’re looking for professional door refinishing services, Desert Rose Doors is here to help. Our experts ensure high-quality craftsmanship, making your doors look as good as new.
📞 Contact us today to schedule a consultation!